The Preset Collection is a tool to organize your presets in logic, simple, advanced or mysterious (?) ways (it’s up to you!), or just a simple mechanism to save your favorite sounds and easily browse through artist's presets.
You can either use the simplified version in the menu bar of each Softube plug-in, or you can press the open window icon to open the full Preset Collection.
Browsing presets
Use the ◀ ▶ buttons in the menu row at the top of the plug-in to step through presets. Click ▼ to open a menu to select presets. By default, presets are sorted by “collection”, usually by artist or theme.
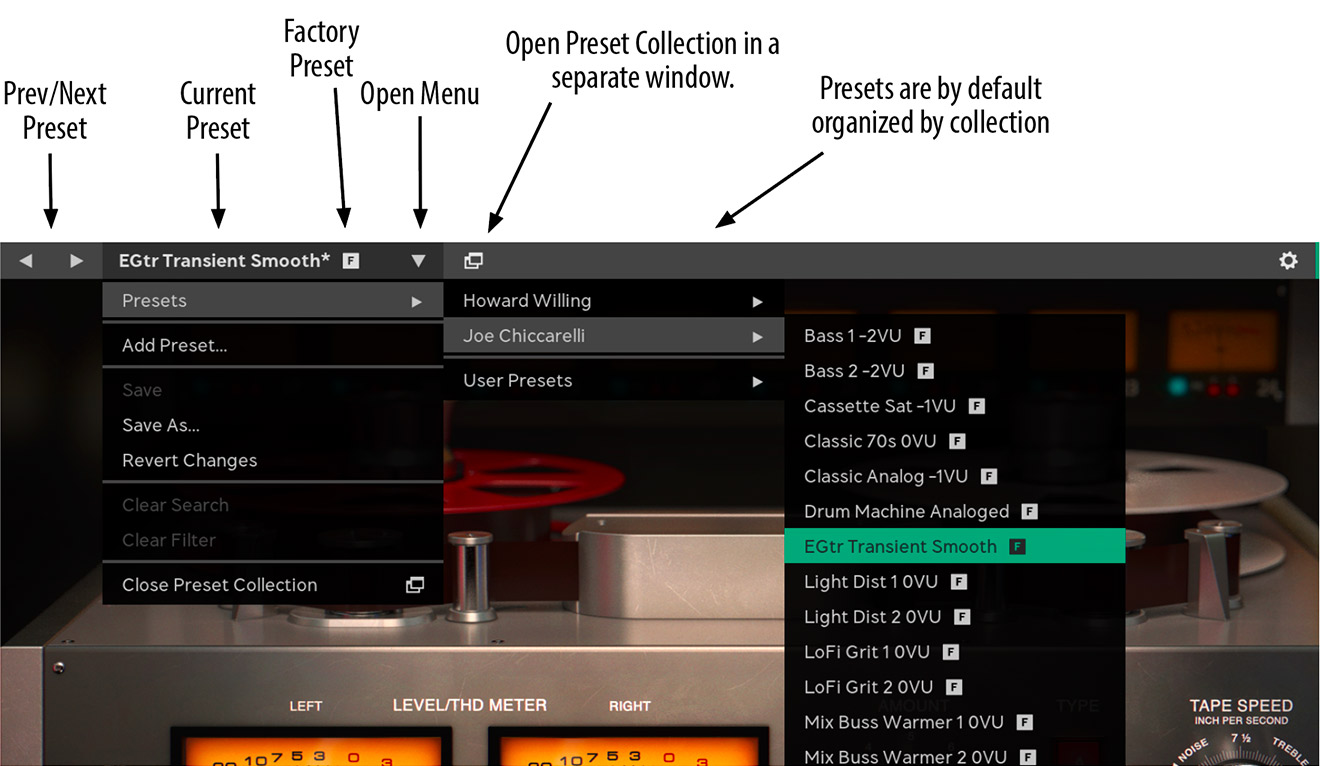
Browse presets directly from the menu bar at the top of the plug-in.
Softube plug-ins support setting a preset as default which means all new instances will load with that preset from the get-go. The preset can be either a factory preset you like or one you have created for yourself (or, perhaps something a friend sent you!). Your default preset will be marked with a house ![]() both in the plug-in menu bar and in Preset Collection proper.
both in the plug-in menu bar and in Preset Collection proper.
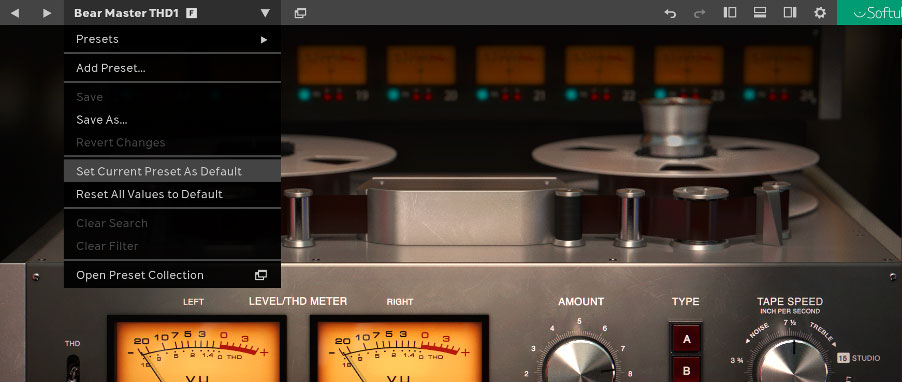
You can set a default preset directly from the Plug-in Preset Browser once you have a preset loaded.
It is only possible to set a default preset if you have a preset loaded. Once you have found a setting you would like as your new default, create a new preset and then choose “Set Current Preset As Default” in the Plug-in Preset Browser or right-click on the preset in Preset Collection and choose “Set As Default”.
If you want to go back to not having a preset set as default, you can do so by right-clicking the current default preset in Preset Collection and choosing “Remove As Default”.
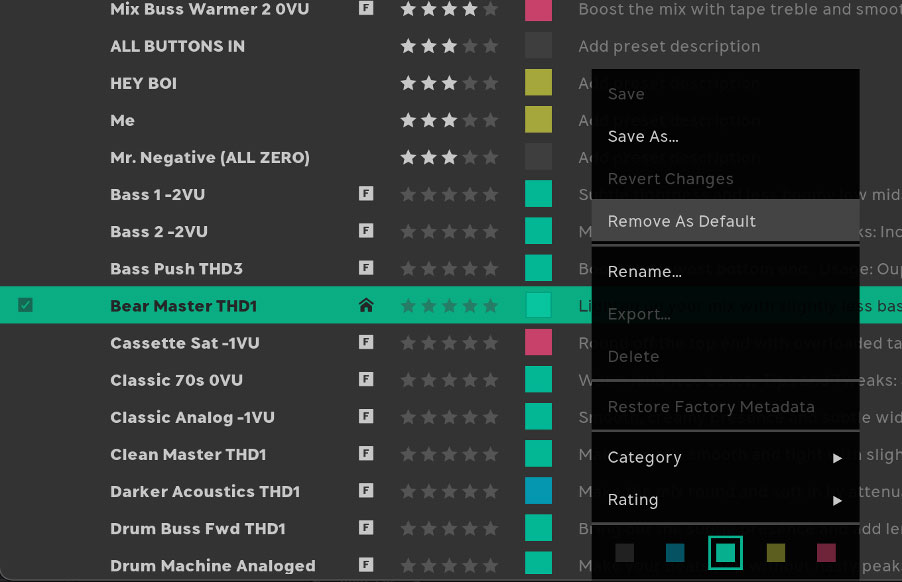
Removing your default preset can be done in the Preset Collection context menu.
Note that if you choose a preset as default when you have made changes to it, your default preset will be the unchanged preset. If you like your current settings as default, either save the preset or re-save it with a new name.
Saving Presets
Press “Add Preset…” in the dropdown menu to save the current settings as a new preset. Type the name of the preset and press enter. If you’ve made changes to a current preset and wish to overwrite that preset, just press “Save”. Press “Save as…” if you want to save it with a new name.
Searching for Presets
If you want to find a specific preset and have a lot of presets, there are many smart ways to search for preset, and all of them require that you open the Preset Collection by clicking the window button.
Search by tag
All presets have a number of tags associated with them, in general they describe the function (“distortion”, “eq”, “compression”), the use case (“female vocals”, “bass”) and the character (“creamy”, “dark”), etc. In plug-ins that use modules, such as Modular, the tags also include which modules are used by the preset (for example “Saturation Knob”)
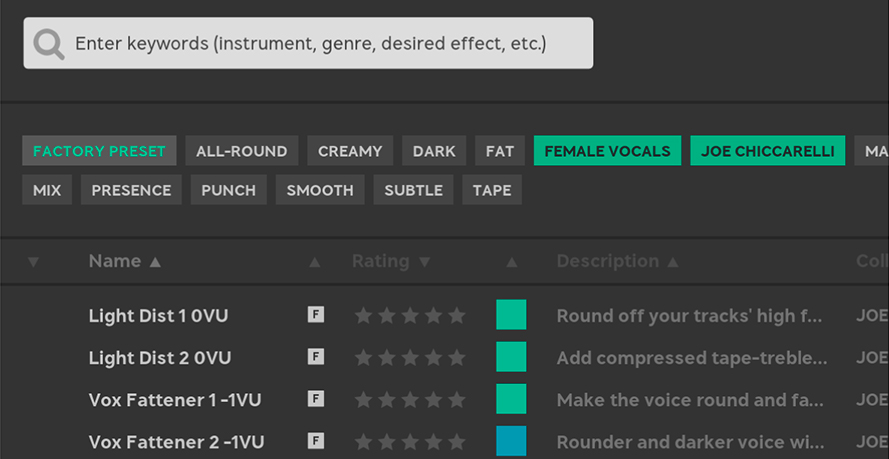
Two tags (“Female Vocals” and “Joe Chiccarelli”) has been selected to show all Joe’s presets suitable for female vocals.
Search box
A search in the Search box will search through all metadata (name, tags, description, etc). If you want to narrow your search, you can specify what you want to search for by using a qualifier, such as “name:” or “description:”.
Possible search qualifiers are name, desc, description, tag, tags, and collection.
Search in the menu bar
When you have selected a subset of presets, for example by searching for “vocals” or using a tag, the search results are available directly from the plug-in’s menu bar. That means that you can easily step through the presets using the ◀ ▶ buttons.
Open the menu to see the search criteria or clear the search.
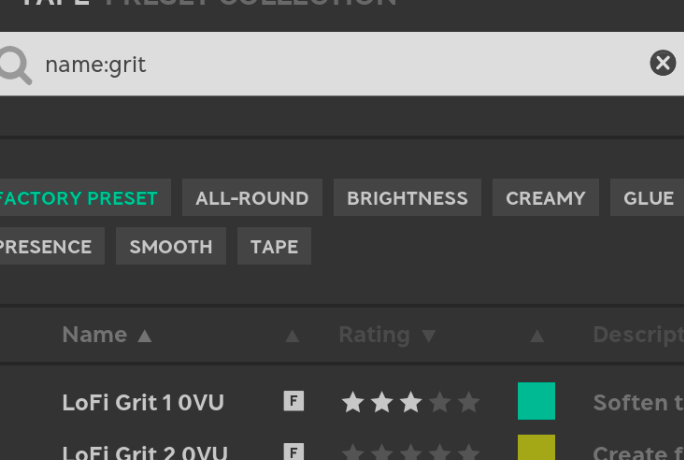
Type “name:” before the search criteria to limit the search to the name of the preset.
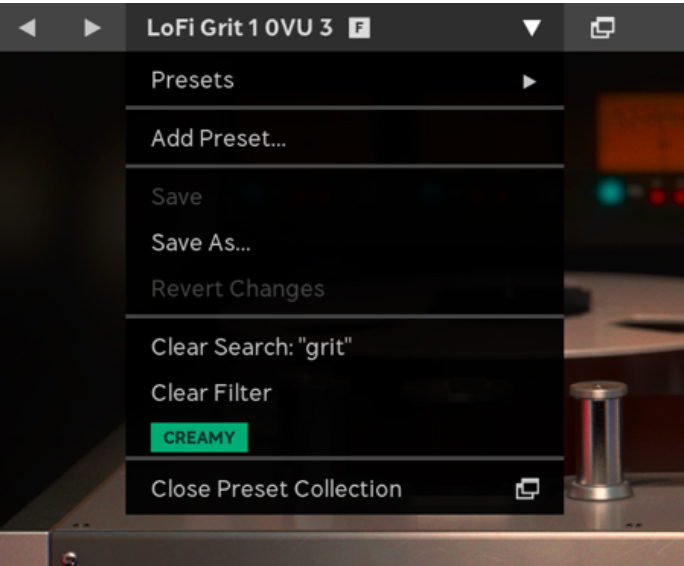
The menu shows the current search criteria, currently selected tags, and options to clear the filter and search criteria.
Plug-in Settings vs. “Metadata”
A Softube preset consists of two parts: the plug-in’s settings and the description of it, what we call “metadata”. Metadata is everything that’s not the included in the plug-in’s settings, for example preset name, description, color, rating, tags.
When you make a new preset by clicking “Add new preset…” the only metadata that you save is the preset name. You need to open Preset Collection to add other metadata, such as a description and tags. If you instead use “Save as…” when you save a preset, the metadata (for example tags) in the currently selected preset will be carried over to the new preset.
Whenever you change the settings in the plug-in, the preset name will be marked with an asterisk * to indicate the current settings are different from the current preset. It also indicates that the preset has changes that aren’t saved. You need to click “Save” or “Save as” to save those changes.

Asterisk (*) indicate that the settings of the plug-in is different from the saved preset.
When you make changes to the metadata, you don’t have to save these. All metadata changes are saved immediately in the preset database.
*) An asterisk looks like this: *
*) ibid.
Click the window icon to open the Preset Collection. Here you can organize, colorize, tag, add icons and images and sort your presets.
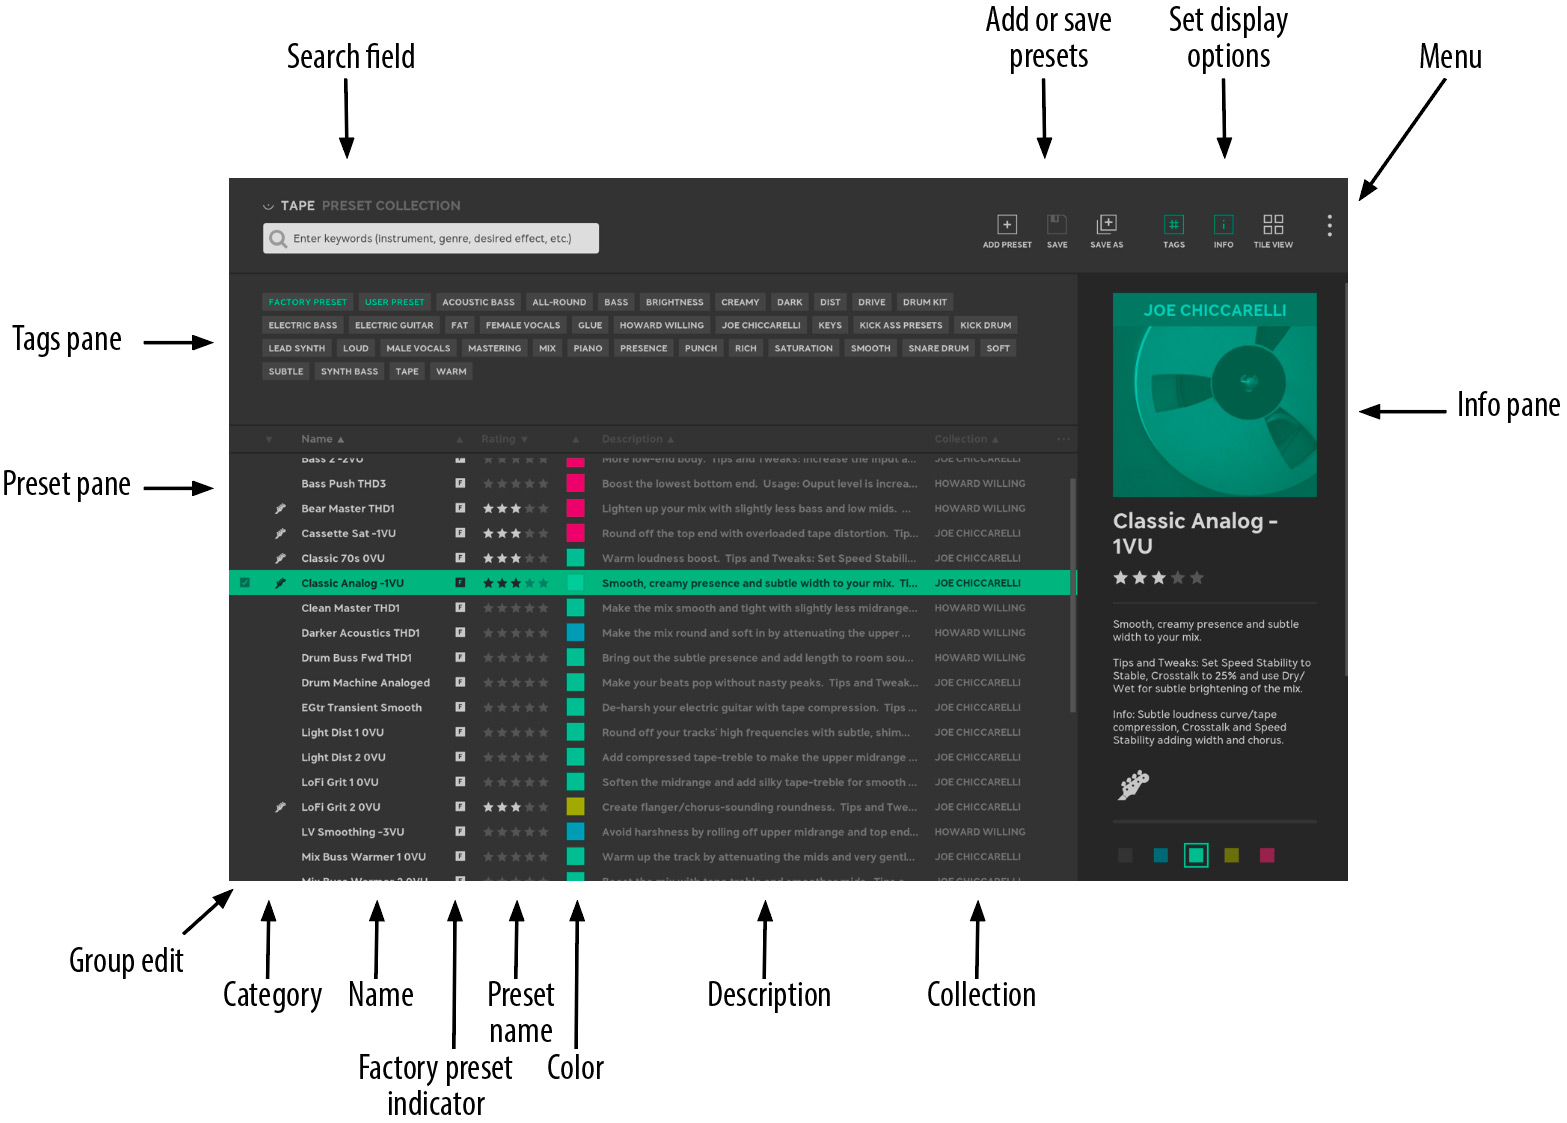
Click here to view the full-sized image in a new tab.
Workflow
For a plug-in with hundreds of presets, the easiest way to start is to type something in the search field, such as “bass”, or select an appropriate tag.

Type in the search field to find presets.
Use the keyboard up/down arrows to step through presets, and if you find something you like (or dislike), change the rating of that preset so that you can easily find it later.
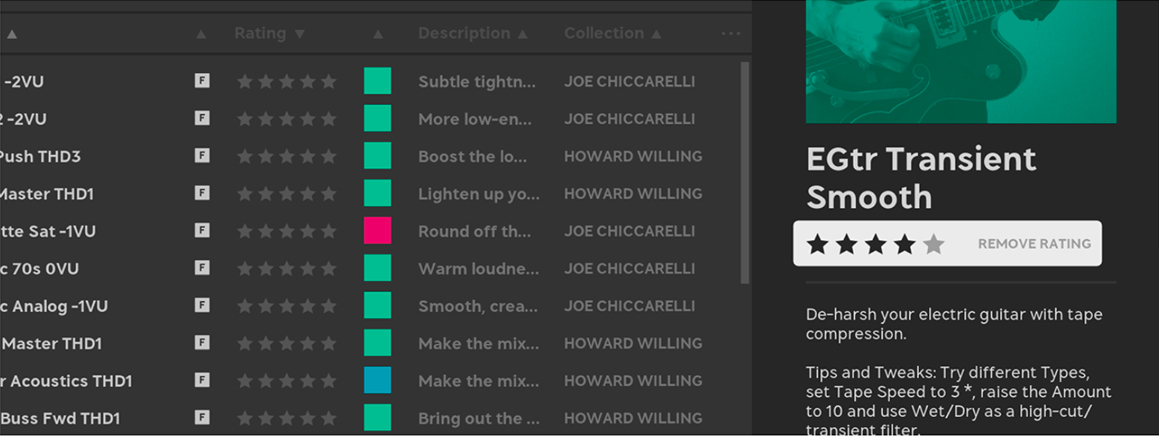
Click on the stars in the Info pane to change the rating. It is also possible to right-click the preset and change rating from the context menu.
Philosophy
The main ideas behind Preset Collection are
- A preset name doesn’t give enough information about how to use a preset. Sometimes you need more info, for example what to listen for, how to tweak it, in which context etc.
- Everyone wants to organize their presets in different ways.
- Tags are a simple way to create “folder like” structures, but without being limited by placing the preset in a single folder. A tag can be a use case, a project name, or just about anything!
With the preset’s description you’ll be able to add info, for instance how many dBs of gain reduction you need for the drum bus to really glue together, and with names, tags, ratings, categories, and colors you can organize those presets any way you want. The tags become powerful if you want to organize presets after projects you’re working on. Tag each preset you make/use with the project name, and you’ll have an extra dimension to use when you browse presets.
Don't be afraid to add or change metadata in the factory presets. (And it's always possible to restore the original metadata later if you want to!)
Organizing presets
All factory presets come with tags and color, but you can remove those colors and tags and organize them in other ways. You can mark your favorite presets with a high rating, a specific tag (“kick ass presets!”, "great for accordion"), a color, or a category, to make them easier to find later. You can select several presets at once to, for example, reset their color, and use your own color scheme. All fields, except Collection, are possible to change.
Customizing the Preset Collection
You can decide yourself how much or how little info you want to show in the Preset Collection, and these settings are stored globally.
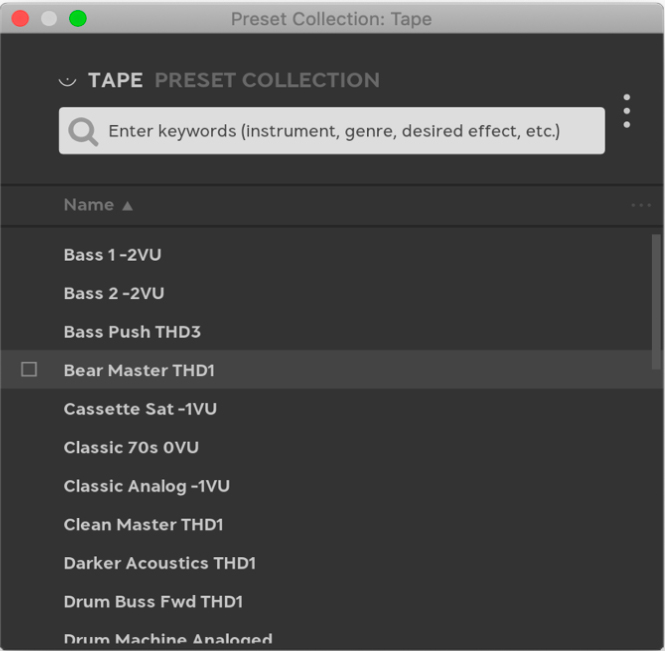
The minimal view of Preset Collection, only preset names and search field are visible.
Showing/hiding info panes
Click on Tags or Info to show and hide the Tags and Info pane, respectively.
Showing/hiding columns
Click on the menu next to the columns header to turn on/off columns in the preset pane.
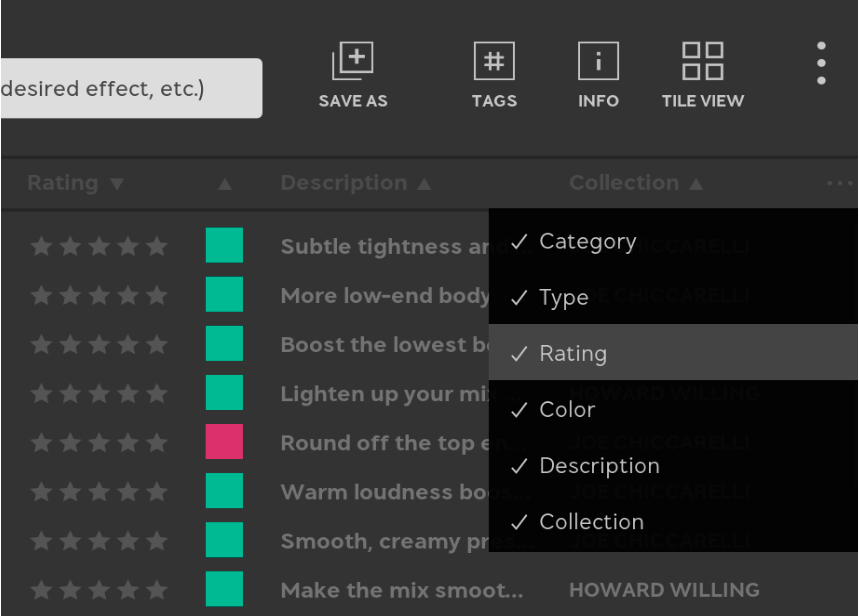
Select which columns are visible from the menu.
Sorting
Use the up/down arrows (▲▼) next the the column header to change preset sorting.
Tile view/List view: Click on Tile View to show presets as tiles, or List View to get back to the default mode.
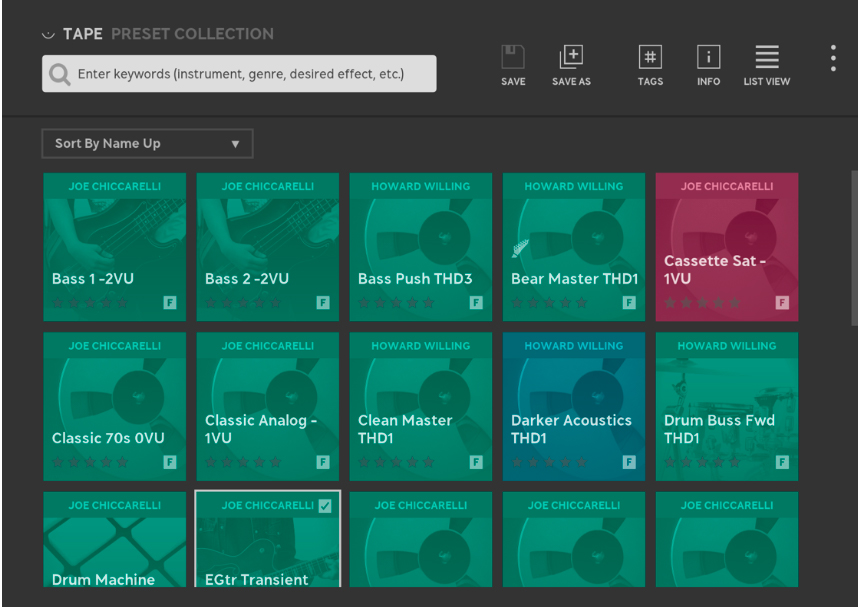
The Tile view.
Resizing tags pane or window
You can easily resize the Preset Collection window or the size of the Tags pane by clicking the edge and drag it.
Search Row: Searches in name, description, tags, etc. To specify a particular field to search in, use one of these qualifiers: name, desc, description, tag, tags, and collection, for example “collection:chiccarelli”
Add Preset: Create a new, empty, preset from the current plug-in settings.
Save Preset: Overwrite the selected preset with the current plug-in settings. Only possible with user presets. If the current preset is a factory preset, use “SAVE AS” instead.
Save As: Save the current plug-in settings, together with the selected presets meta data (tags, description, etc) under a new name.
Tags: Show/hide the TAGS pane.
Info: Show/hide the INFO pane.
Tile view, List view: Switch between a list of presets (LIST VIEW) or tiled images (TILE VIEW)
Menu: Opens the menu with some additional options. See below for Menu options.
Menu Options
Add Preset: Add a new preset.
Save: Overwrite the selected preset with the current plug-in settings.
Save As: Copy the selected preset to a new preset with the current plug-in's settings.
Show/Hide Tags: Show/hide the Tags pane.
Show/Hide Info: Show/hide the INFO pane.
Show Tile View: Show the TILE view instead of LIST view.
Import Preset(s): Import presets from file, for instance if you downloaded a “.softubebundle” file from www.softube.com
Export Selected User Preset(s): Exports the currently selected presets to a “.softubebundle” file, so that you can send them to a friend.
Enter Group Edit Mode: Let’s you select several presets at once, which is useful if you want to export a batch of presets, or change tags, description or other meta data in several presets at once.
Preferences: Opens additional preferences, listed below.
Preferences
Warn When…: Turn warnings on/off when for example deleting or overwriting presets.
Show Images In Info Panel: Turn off to hide the image in the INFO PANEL.
Group presets by collection/group presets by category: Change how presets are grouped in the presets menu in the plug-in menu bar.
Pro tip: select “Group Presets By Category” to get a flat list for all uncategorized presets in the menu bar.
Tags pane

Use the Tags pane to filter presets by tag.
The TAGS PANE lets you filter presets by selecting one or several tags. Select for example the tag “MALE VOCALS” if you want to find all presets suitable for male vocals.
You can select several tags at once.
You can add tags to a preset by clicking “ADD TAG” in the INFO PANE, and subsequently remove tags by clicking on the X on the tag.
Presets pane
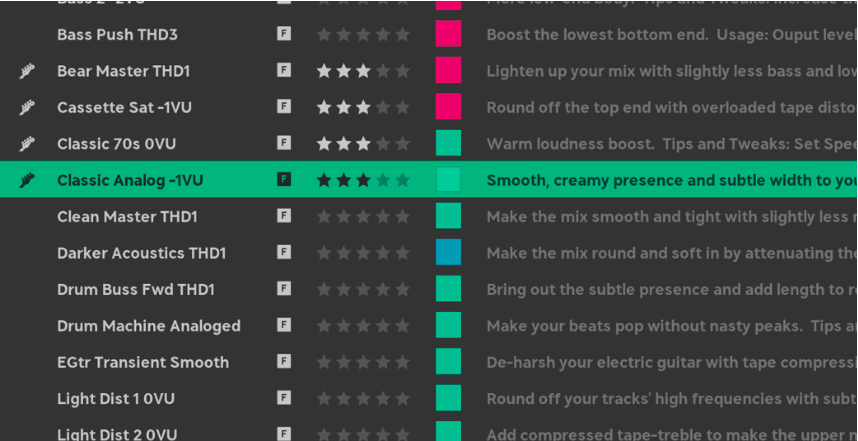
The Presets pane shows all presets in the current search or filter.
The PRESETS pane contains all presets in the current search. You can sort presets, select a preset, or edit a preset from the presets pane. The PRESETS pane can either be visualized as a list, or as a “TILE VIEW” with images for each preset.
Tip: Double click on the preset name to change it.
To sort presets in the LIST VIEW, click on ▲▼ for a column to sort down or up for that column. In the TILE VIEW, open the “SORT BY…” drop down to select sorting.
Context Menu (Right Click on a Preset)
Right-click on a preset to bring up a context menu with the following options:
Save: Save preset.
Save As…: Save as a preset with a new name.
Revert Changes: Revert all changes made to the preset.
Rename…: Rename the current preset.
Export…: Export the current preset.
Delete: Delete the current preset.
Restore Factory Metadata: If metadata edits, for example color, tags or ratings were made to a factory preset, you can revert them here.
Rating: Sets/changes the rating (0-5 stars) of a preset.
Color: Sets/changes the color of the preset.
Info pane
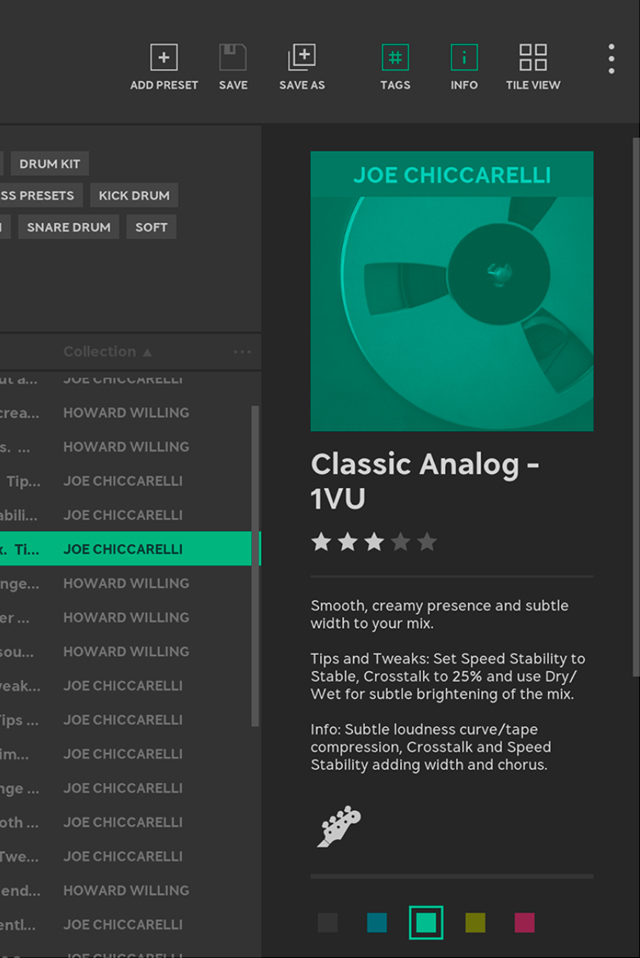
The Info pane contains all metadata for the currently selected preset and lets you edit these fields.
In the INFO pane you can edit the metadata of the selected preset. You can change image, name, rating, description, category, tags and color. Whenever it is possible to change a field, a pen icon will appear. All changes made to the description of the plug-in are saved immediately.
Change Image
The image needs to be in PNG format, and will be converted to black-and-white on import.
Group Edit Mode
It’s easy to edit several presets at once, for instance if you want to change rating or add a tag to multiple presets. Enter the Group Edit mode by selecting several presets in the check box on the left. Once in Group Edit mode, you can use Shift + click to select a range of presets.

Select several presets by clicking the check box to the left.
In Group Edit mode it is possible to edit several presets at the same time:
- Change rating, color, and category
- Append text to the name or description
- Add tags, or remove tags common for all selected presets